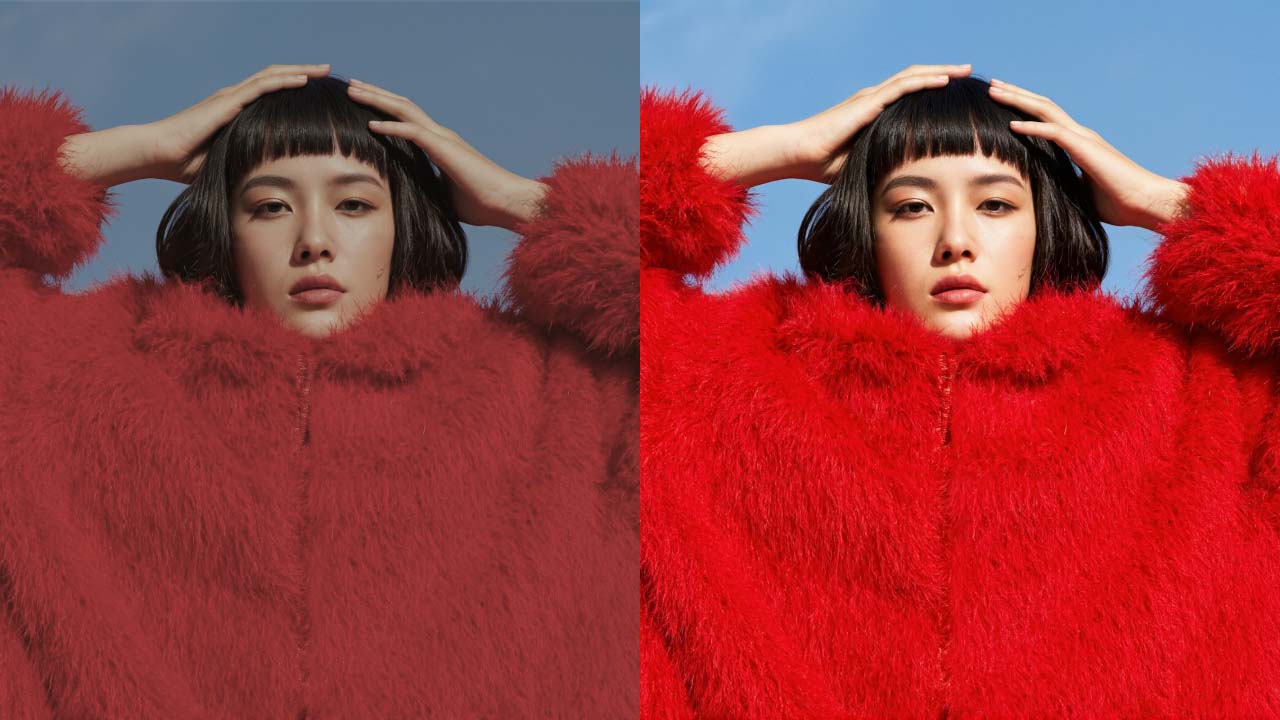
Did you know?
The color correction plays a super important role in the field of photography.
It involves correcting the colors of an image to make it appear natural.
In this blog, we will tell you how to color correct photos easily.
You see, each type of photo, such as a portrait, landscape, product, or event, requires a unique color correction approach in order to get the best result.
We will be talking about all of them in detail ahead. We will tell you how you can color correct each kind of image to bring forth its natural form, enhance its visual appeal, and make it go from average to outstanding in just seconds.
So, without any further ado, let’s begin.
What is color correction in photography?
So, first and foremost, here we take a look at the basics.
If we put it in simple words, the process of color correction is adjusting and improving the colors in an image to obtain a natural and balanced look.
Its main function is to ensure that the colors in an image match with how they appear in the real life.
It involves working on different parameters, such as white balance, contrast, saturation, etc., to produce a realistic appeal.
Let us understand it better with this example ahead:
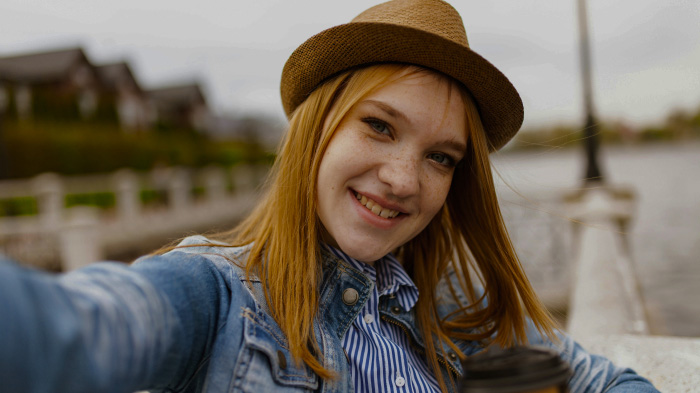
Doesn’t this selfie look a bit dull and unnatural?
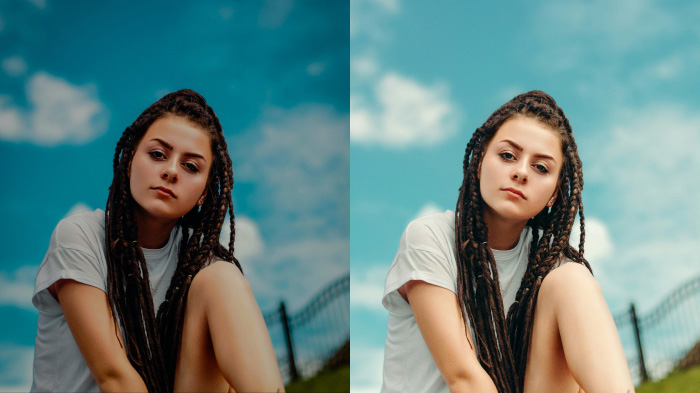
Now, look at this one:

Here, the right color correction has restored the natural look of the picture beautifully.
That’s color correction!
Now, as you know what it is, let us move on to why it actually matters.
Why does color correcting a photo matter?
We think that the photography is all about a moment.
But, the thing is, at that moment, it may take place in different lighting conditions and environments. This impacts the final image output.
Multiple factors, for example, artificial light sources, environmental elements, and even the camera settings, can affect the accuracy of the colors in an image.
This makes color correcting a photo more of a need than just a want.
Here is why it’s important:
It makes an image match its real-life version, which creates authenticity.
1. Fixing lighting: It corrects the color shifts that are caused due to poor lighting or mixed light sources.
2. Removing unwanted tints: It eliminates specific color casts (yellow or blue tints) that are a result of various light sources.
3. Restoring colors: When camera settings or environmental factors distort the accurate color representation of an image, it helps restore it.
4. Improving visual appeal: Adjustments like contrast and saturation enhance the visual appeal of a picture, making it look more vibrant and as if it were professionally taken.
5. Maintaining consistency: When it’s a series of multiple photos, it ensures consistency in tones.
6. Storytelling: Proper colors in an image give rise to the right emotions and mood among the viewers.
Wow! Interesting, aren’t they all?
Now, with importance also covered, let us finally see how you can correct colors in different kinds of photos.
Related post: Best AI Photo Editor.
How to color correct photos?
It is not like one works for all.
Each photo needs to be corrected differently to bring out the best of colors in it.
Let us take a look at how you can do it in different common photographs:
Portrait photography
1. Adjust white balance
Modifying the white balance in your portrait neutralizes the color cast that is there due to lighting and ensures a natural skin tone.
2. Enhancing skin tones
It is important to adjust skin tone in your portraits so that the subject doesn’t look too dull or too red, which is different than they are. To do so, you can subtly adjust hues and saturate the photo.
3. Editing exposure
Correcting the exposure in your portrait balances highlights and shadows, which flatters your facial features.
4. Maintain subtlety
You must avoid over editing the image. Keep in mind that the goal is to enhance the existing beauty of the portrait.
Landscape photography
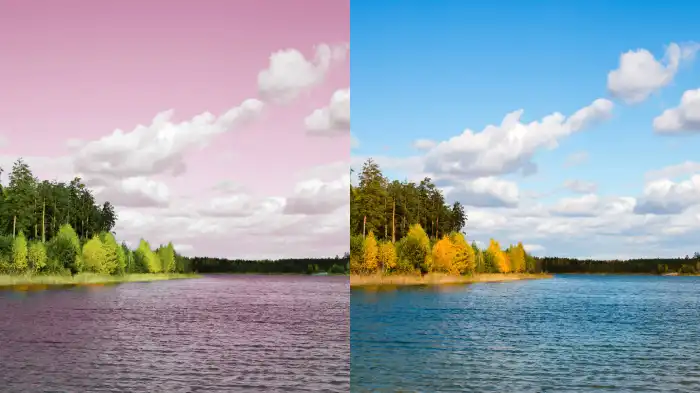
1. Boost saturation for sky
Improving the saturation in an adequate amount enhances the natural colors like of the skies and greenery.
2. Adjust highlight and shadows
Adjusting shadows and highlights brings out more detailing, like the bright skies or dark foreground.
3. Balance warm and cool tones
The adjustments in white balance and temperature help you maintain a balance between warm and cool tones. You can use warm tones for summer scenes and cool tones for winter scenes.
4. Fine-tune contrast
Adjusting contrasts proves to be immensely helpful. You can invert the colors of the image, which helps to see where the color balance needs adjustment and is also helpful for color grading and fine-tuning contrast in photos. Inverting colors and gray scaling techniques are often used by professional photographers to refine their work for more color accuracy, however, with due consideration to a lot of other factors.
Product photography

1. Control brightness
Make sure to adjust brightness so that the product is displayed under the best light. It plays an important role, especially when it is product photography for e-commerce.
2. Manage shadows and highlights
Adjusting exposure, shadows, and highlights of the product picture helps prevent different parts of the product from appearing too dark which loses the details, and too light, which leads to unflattering reflections.
3. Remove color casts
Correct any unnatural tints (yellow or blue hues) that are caused by artificial lighting by editing white balance and color temperature. This makes the product’s color appear natural and true to life.
4. Consistency for branding
The same colors should be maintained consistently throughout all the product images to align with the brand’s identity.
Related post: Best Product Photography Ideas
Event photography
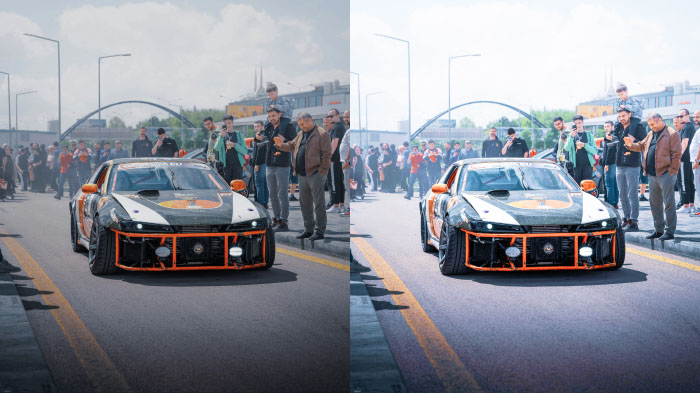
1. Adjust white balance
It is important to adjust the white balance of the image for consistent results, as sometimes the photography is done indoors in fluorescent lights or outdoor natural light.
2. Enhancing contrast
When you adjust contrast in your event photos, it adds more depth and sharpness, which helps make the key moments stand out.
3. Matching tone across all photos
In the case of event photos, it is important to ensure consistency in colors and exposure across all the photos in the album.
4. Batch processing
A large number of photos from an event need batch editing. This helps in achieving the same correction across all the images.
And there you go!
Quite some easy and interesting color correction tips, aren’t they?
But, let’s not forget about the mistakes you should avoid making.
Let us go through them.
Common mistakes to avoid during color correction
No doubt color correction is important.
However, overdoing it or applying incorrect techniques can damage the quality of your images.
To help you conduct a quality color correction in photos, we have put together a list of some common mistakes that you should avoid:
1. Over-saturation or under-saturation: When adjusting saturation, the addition of excess or less color might make your image look unnatural, so you must take care of it.
2. Incorrect white balance: Make sure you adjust the white balance and do so appropriately in the images so that the tones look natural.
3. Ignoring the originality: You must always keep the original mood of the image in mind when correcting the colors in it.
Related post: Best AI app for product photography.
Final words
Color correction is an important step in photography that makes your photos look professional and polished.
While tools and techniques can make your work better, it is important to approach color correction in photography with care, avoiding common mistakes like over-saturation or neglecting the original feel of the image.
With practice and the right tools, you can become a color correction expert and take your photography to the next level.
Frequently asked questions
1. How do I fix photos where the colors look washed out?
You can fix a photo that looks washed out by adjusting saturation. You can also improve contrast; it will make the colors appear richer. Adjusting shadows and highlights will add depth and reduce flatness.
2. What is the difference between color correction and color grading?
Color correction is making sure your photo looks natural by fixing the issues, such as white balance, exposure, and color balance. On the other hand, color grading is a process that adds stylistic tones to enhance the overall aesthetic of the image.
3. Is there any free app for photo color correction?
Color correct your photos on your iOS or Android device for free using the LightX app.
4. How to color correct photos online for free?
You can color correct your photos online for free with LightX. Easily adjust contrast, brightness, saturation, hue, highlights, shadows, and white balance in photos.
