How to Blur the Background of a Photo: Already Taken or New!
12 min readPublished on: 4 months ago
What makes your photo truly stand out?
It’s not an expensive DSLR camera—it’s a perfectly blurred background!
Yes, you read that right! Once you master how to blur the background of a photo, you can turn any ordinary shot extraordinary. It is indeed a game changer that adds depth and focuses attention exactly where you want it.
In this blog, we will tell you the steps for creating this effect, along with many more interesting details.
How to blur the background of a photo? Top 3 easy, free, and instant ways!
Guess what? Blurring the photo background is easier than you might think!
We’re in 2024, and today’s technology makes it super simple to blur your pictures’ backgrounds. In fact, you can have photos that look like they were taken by a pro—by you—all for free!
Whether it’s the photos you’ve already taken or the ones you plan to capture, you can easily blur the background.
Let’s explore how you can achieve this!
How to blur the background of a photo already taken
You can blur the background of any photo you’ve taken using LightX’s AI Blur Background tool. It is presently available for use on your laptop, PC, and phone. Just pick a device and get started!
Steps to blur the background of an image on a laptop or PC with LightX
1. At first, open the LightX website on a supported browser. Go to the “Editor Tools” and select the “Blur” tool.
2. Secondly, upload or drag and drop your image onto the page.
3. Thirdly, choose the “Auto” option to let AI detect and blur the background automatically. Pick “Manual” to select the background area to blur yourself.
4. Then, adjust the blur strength with the “Blur Intensity” slider. Slide right to increase it, or left to decrease it.
5. If needed, then fine-tune the edges using tools like “Magic Brush” and “Magic Erase.”
6. Afterwards, preview and then click “Apply” to generate your image with a blurred background.
7. Finally, click “Download” to save your edited image in your preferred format and resolution. Once the image is there on your device, share it online or print it.
Steps to blur the background of a photo on Android or iPhone with LightX
1. Firstly, download the LightX app from the Google Play Store or Apple App Store. Open it and go to “Portrait Tools,” then select the “Blur Background” tool.
2. Secondly, choose the photo you want to edit from your gallery. Crop or resize it as needed.
3. Thirdly, LightX’s AI tool to blur the background of an image automatically detects the subject and blurs the background. This put the main subject under focus with sharpness and clarity.
4. Then, adjust the blur strength using the “Intensity” slider. Slide right to increase the blur and left to decrease it.
5. Refine the edges with “Magic Brush” or “Magic Erase” if needed.
6. Finally, preview and then click “Save” to export your edited image to your gallery or share it directly on social media.
With LightX, you can blur the background of a photo on iPhone, Android, or online like a pro!
How to blur the background of a new photo that you want to capture
Capture a new photo with a blurred background using the “Portrait” mode in the Camera app on most phones. It’s quick and easy!
Steps to take a picture with blurred background using the phone’s Camera app
1. To begin with capturing a blurred background photo, launch the Camera app on your Android or iPhone device.
2. Then, select the “Portrait” mode. On some devices, it might be labeled as “Live Focus,” “Depth Effect,” or similar.
3. After that, position the subject within the frame. Tap on them on the screen in order to focus. The app will automatically blur the background.
4. Now that everything is set, press the shutter button to take the picture.
5. Finally, check the image in your device’s gallery to ensure the background blur is as desired. Or, re-take the photo if required.
And that’s all that is there about the steps!
Now that you know how to blur backgrounds, you might wonder why it’s worth doing.
Let’s find out!
Why blur image backgrounds when photo editing has many more possibilities?
Even though photo editing provides many options, background blur remains a fundamental technique. It gives your photos that wow factor. Allow us to break it down for you!
What does it mean to blur the background?
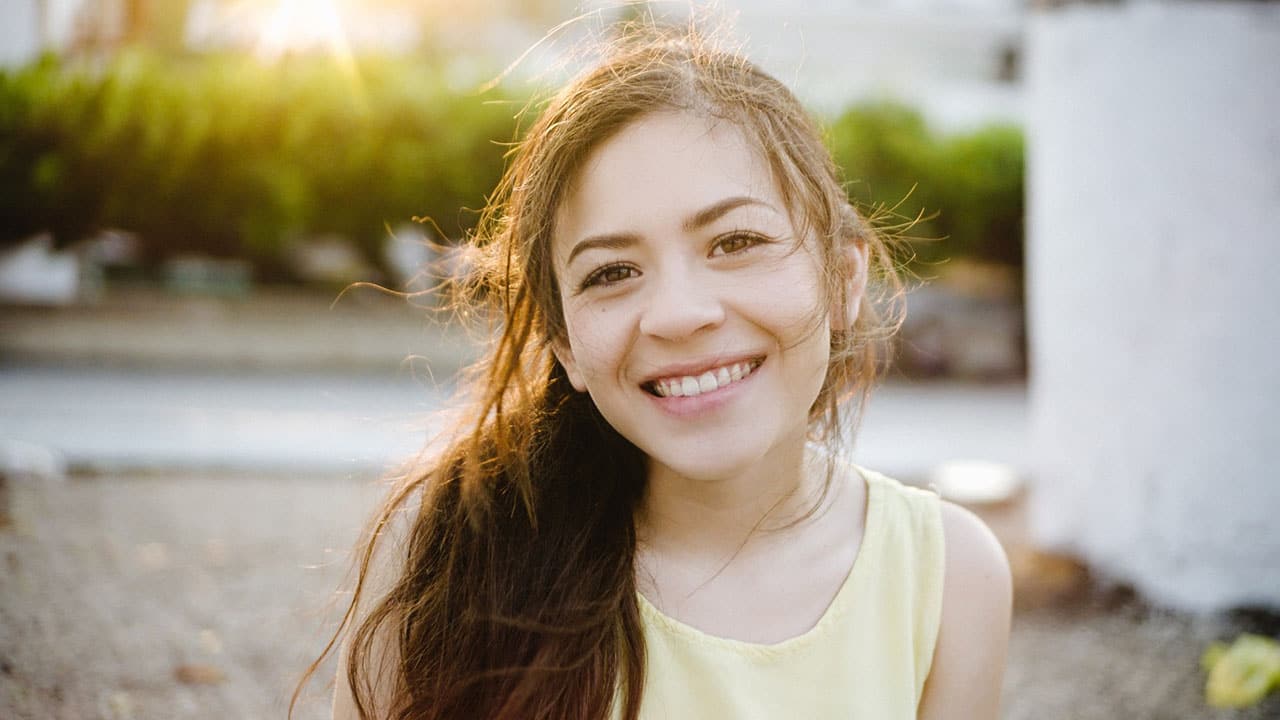
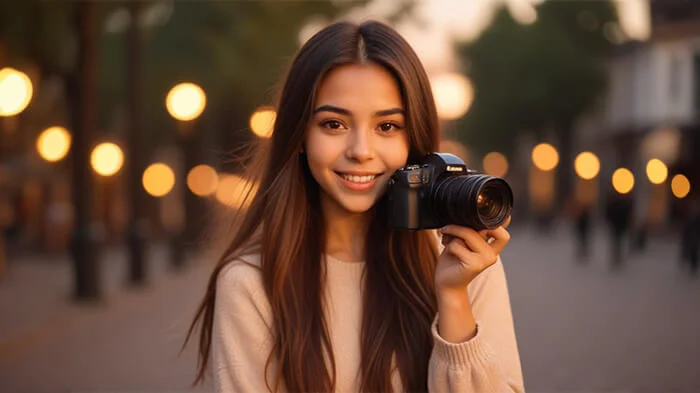
Blurring the background involves softening the area behind your subject in a photo. You achieve this effect by focusing on the subject and allowing the background to fall out of focus. As a result, this creates a smooth, pleasing look that highlights the subject and adds depth to the image.
Why it’s worth blurring the background of your photo
Blurring your photo’s background is undoubtedly a smart choice. Here are several reasons why you should just go for it.
Enhances focus on the subject
Blurring the background directs overall attention to the subject, making it stand out more.
Adds depth to the photo
A blurred background creates a sense of depth. This depth gives your photo a feeling of three-dimensionality.
Reduces distractions in the picture
Blur the background of photos in order to hide distractions or clutter to guide attention towards the subject.
Creates a professional look
This technique mimics the style of high-quality professional photography to emphasize the addition of an artistic touch.
Simplifies overall composition
By softening the background, the overall composition becomes significantly cleaner and more balanced.
To explain it better, here’s a comparison of two photos, with and without a background blur.
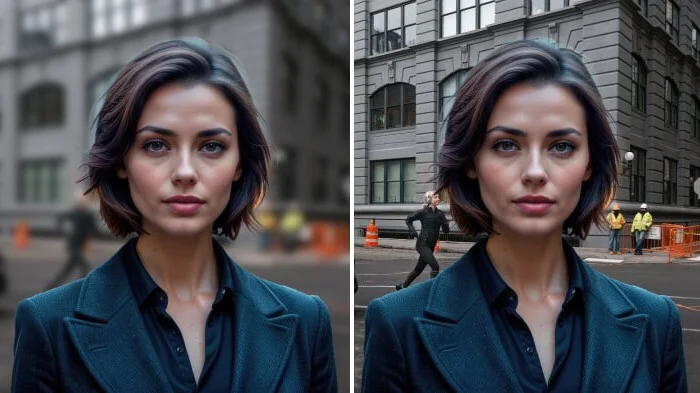
| Factors | With Background Blur | Without Background Blur |
| Background details | Softened and out-of-focus, reduced visual noise | Numerous distracting elements like people, signs, and objects |
| Focus on subject | The subject stands out against a blurred background | The subject blends in with the background, unable to grab attention |
| Overall appeal | The image looks cleaner, more organized, and visually pleasing | The photo appears chaotic due to the busy background |
| Professional look | Mimics a professional look, like captured by a photographer | Feels less polished and less like professional photography |
| Emotional impact | The blurred background enhances the subject’s emotional presence. | The busy background can detract from the emotional impact of the subject. |
So, things are looking much clearer now, aren’t they? Creating a blurred background in a photo is surely a great move.
But should you opt for AI background blur or just use your camera’s Portrait mode?
Let’s discuss.
Why choose an AI blur background tool over your camera’s Portrait mode
Your camera’s Portrait mode is handy, agreed! But, an AI tool to blur the background of a photo such as LightX’s, offers many advantages:
1. Extra flexibility: Use AI on any photo, no matter when or how it was taken. On the other hand, the Portrait mode only works with new captures.
2. More control: AI gives you precise control over the blur effect. Apply and fine-tune it to match your vision, unlike the preset blur in Portrait mode.
3. Customization option: Blur the entire background or just parts of it with AI. This lets you add a personalized touch. On the contrary, the fixed Portrait mode can’t achieve this.
4. Consistent quality: AI allows you to consistently blur the background of photos. It ensures uniformity in your visual content.
Now that you have understood the benefits of using AI over the camera’s Portrait mode, you’re likely keen to use it.
Let’s check out its best use cases.
Where to use the AI background blur effect for maximum impact
Make a difference significantly and leave an impact with the AI background blur effect. It holds the power to transform your various types of photos with minimal effort.
As has been noted, let’s explore where all this effect can truly shine and bring out the best!
Portraits
Focus on the subject and soften the background to enhance portrait photos.

Selfies
Make yourself stand out in selfies by blurring the distracting or messy background.
Profile pictures
Ensure a clean, professional look in your profile picture by blurring the background.

LightX also provides the option to create an AI profile picture with your cutout against diverse backgrounds.
Product photos
Blur out the background of a photo of your product to draw attention to it.
LightX also offers the option to generate your AI product photos in different captivating background settings and scenes.
Event photos
To emphasize the key person or moment in the picture, blur a busy background.

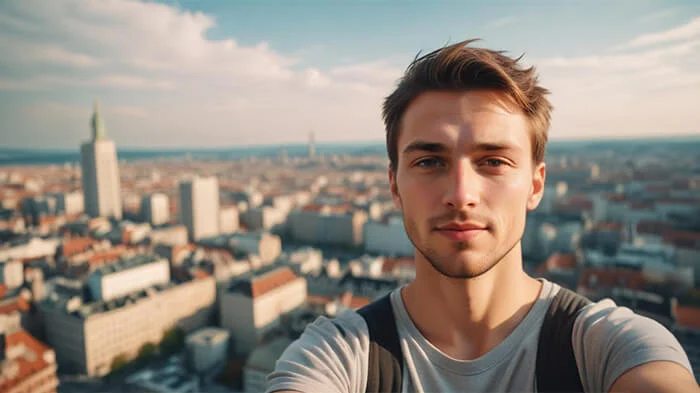
Travel photos
Take the case of travel photos. Showcase a landmark or your presence by blurring an unattractive background.

Food photos
Bring attention to your dishes by blurring the background and focusing on them.

Fashion photos
Let your clothing and accessories shine by minimizing the background distractions.

Real estate photos
Present a property’s best features by blurring the distracting elements in the background.

We say, try it out and prepare to be amazed!
There is something more to enhance your photo further—bokeh effect!
Let’s learn about it.
Take your photos to the next level with a captivating bokeh effect
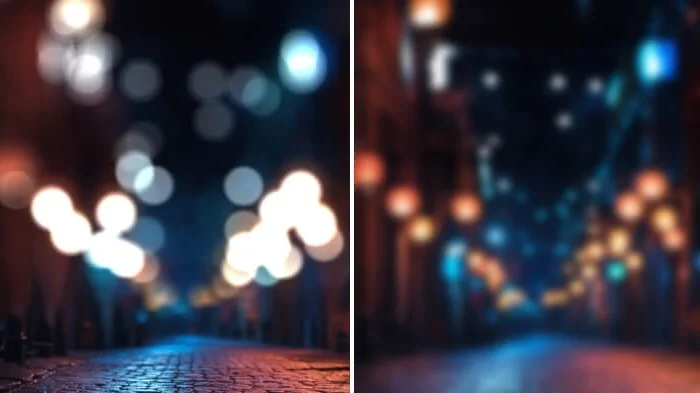
Adding the bokeh effect to a photo background is one popular technique.
Wondering why? Because, it creates a pleasing, out-of-focus appeal that enhances your photos.
It’s closely related to background blur, yet distinct. Let’s dive into the details to learn more.
What is the bokeh effect?
Bokeh refers to the aesthetic, out-of-focus background areas in a picture. Often seen as soft circles or shapes of light, it adds depth, and an artistic and professional touch. It helps to make the subject stand out more clearly.
Bokeh vs. blur: What’s the difference?
Both bokeh and blur soften the background. But, they serve different purposes.
The bokeh effect creates visually appealing patterns and lights in the out-of-focus background areas. It adds artistic value to your photo, highlighting the subject more prominently. However, when you make the background of a picture blurry, it reduces the clarity of the background. This makes the background less distracting.
Add the bokeh effect to your photos with LightX
With LightX, adding a bokeh effect to your photos is unquestionably simple and intuitive.
Its AI person photoshoot tool, available online and in the app, has you covered. Using just a text prompt, you can transform the background with an AI bokeh effect.
Make your photos speak volumes with a mesmerizing bokeh background.
Final takeaways on blurring photo background
So, here we are, wrapping it up!
Blurring the background of your photos can surely turn them into a masterpiece. Enhance your portraits, selfies, product shots, and whatnot! A blurred background makes all the difference by focusing attention and adding depth.
Thanks to LightX’s AI tool and this blog on how to blur the background of a photo. Achieving this effect is indeed a breeze. You don’t need any expensive software or complex tutorials. With just a few clicks, your photo featuring a perfect background blur effect will be ready.
Wait no more! transform your photos with a fresh, professional look now!
Frequently Asked Questions
1. How does background blur work?
The background blur effect works by softening the area behind the subject in an image. This reduces the background’s sharpness and helps draw focus to the main subject. An AI tool like LightX’s uses AI to automatically detect and blur the background.
2. What is the best way to blur a background?
The best way to blur the background in a photo varies. For your existing photos, you can use LightX’s AI tool to add a custom background blur effect precisely. For new photos, utilize the Portrait mode on your camera.
3. How do I blur an unwanted background?
To blur an unwanted background, use LightX’s AI background blur tool. Follow the simple steps mentioned below:
1. At first, upload your photo to the tool.
2. Afterwards, select from the “Auto” and “Manual” background blurring options based on your need.
3. Once the blur effect gets applied to the background area, adjust its intensity. Fine-tune with tools like “Magic Brush ” or “Magic Erase,” if required.
4. Finally, download and save the edited image.
4. How do you selectively blur the background?
In order to selectively blur the background, you can use LightX’s AI background blur tool. Firstly, upload your photo and choose the “Manual” blur option. Secondly, select the specific background areas you want to blur. Then, Adjust the intensity to your liking. Once done, download and save the final image.
5. How to be sure the background blur effect looks natural?
Blur the background of a picture naturally by applying a subtle blur effect. In LightX, using the default blur intensity is often effective. This is because the AI automatically applies a suitable amount. If you wish to adjust it yourself, keep the changes moderate. This approach helps maintain a natural and pleasing blurred background effect.
6. What are some common mistakes to avoid when using background blur in photo editing?
One of the most common mistakes is applying too much or too little blur effect. Over-applying it can make the photo look unrealistic. While under-applying it might not achieve the desired focus. To avoid this, adjust the blur intensity carefully in a balanced manner.